Sunday, December 28, 2014

Gerbubble Bug "Newfangled"

If you've seen some of my other posts then you know of my fascination with Tom Loving's "Gerbubble Bug". It's a square head bass popper that Mr. Loving invented nearly 100 years ago, and it was my go to popper for much of my early years in fly fishing for bass... in fact, it was the inspiration for my "Zudbubbler" foam popper.
The Gerbubble Bug still holds a special place in my heart and I recently decided to make some for display purposes. Oh, they will surely catch fish as well as they did when I was younger, but nowadays I rarely fish them and the Zudbubbler takes most of the hits.
I do sometimes get into a nostaligic mood and will bring out the GB to get a few fish just for kicks, although the idea of a toothy critter stealing one is something that usually keeps them tucked away safely.
In this tutorial I will show you how I make them. Although I believe most of the steps are true to how Mr. Loving made them I have taken liberty to use a few modern materials that work much better (in my opinion) than what was available in days gone by.
I believe I also read that Mr. Loving's Gerbubble Bug was originally made of cork, but he later began using balsa wood as it created a nicer looking finish. I will also be using balsa for the same reason.

Step 1: I typically begin with a 9/16" tall x 1" wide piece of balsa and cut it to a grain length of 1 1/4".

Step 2: Sand the block so it tapers on the top and sides, leaving the bottom un-sanded. I typically use my power disc sander for this step but you can easily use a hand sander as shown above.

Step 3: When finished sanding, your block should look similar to this. Size is not as crucial as you may think, but this particular body tapers down to a measurement of 3/8" tall x 1/2" wide at the rear.

Step 4: Using a hacksaw blade, cut a grain length groove on the bottom of the block. keeping it as centered as possible at the front and rear so it will track straight when casting. I typically make the groove about twice the wire depth of the hook I'm using.

Step 5: Choose an appropriate hook. Many will work, but for this popper I have choosen a TMC 202SP Spey hook Size 1/0. Wrap the hook with a thread that will absorb the epoxy, I like Ultrathread 3/0. Once the thread is wrapped and tied off, mix up some 5 minute epoxy, coat the wraps and insert the hook into the groove. Make sure your hook is lined up straight with the balsa block and then fill in the remainer of the groove with more epoxy. Allow to dry.

Step 6: Paint the balsa. I typically brush one solid coat, let it dry, sand it with a fine grit sanding sponge and then paint a final solid coat. You can use whatever type of paint you wish here.  I use a waterborne enamel because it's easy to clean up, durable and I have a bunch of it. No need for a primer either.

Step 7: Using a hacksaw blade, saw a groove about 1/8" deep along each side of the balsa. I usually keep it about an 1/8" up from the bottom as well.

Step 8: Dipping a round object such as the end of a paint brush in the paint and simply pressing it to the popper body is a great way to get a perfectly round eye. Wait until the paint dries, then add a smaller dot using black for great looking eyeballs.

Step 9: Here's where things get fun for me. Getting creative with paint! The round end of the brush handle also works great for perfectly round spots... or simply move it around a little for realistic frog spots. Fine tipped brushes work great for detail work. Have fun and be creative on this step!

Step 10: With the paint completely dry, the popper finally reaches the vise. I've switched my thread to 6/0 Uni-thread... the thinner diameter of 6/0 will make for a cleaner tie off a few steps later. Tie in a tail material of your choosing. There are numerous possibilities here as well, but I've chosen a clump of dyed black bear fur. Some other options include marabou, buck tail, craft fur etc.

Step 11: I like to add some grizzly hackle feathers for legs. Rubber or silcone legs are a great option here as well.

Step 12: Add a hackle feather of your choice and tie off with a few half hitches. For hackle, I prefer a long webby Schlappen feather in a contrasting color. Also, after I tie in the hackle feather by the tip, I wind some dubbing around the hook and palmer the hackle feather through it (like I do on the Zudbubbler tutorial) as this helps the hackle to splay out better. Don't bother trying to whip finish over the bulky balsa head unless you're a pro at doing it by hand... a few half hitches are all that's needed, and a half hitch is much easier to do over the large popper head.

 Step 13: Using a fine tipped bottle, squirt some Zap-a-Gap into the entire groove along the side of the body.

Step 14: Here's another step where you can be creative. Originally this step called for a hackle feather. I frequently use schlappen, guinea and mallard flank but one of my new favorite substitutes is Enrico Puglisi's EP Foxy Brush in the 3" wide version. In any case, fold it in half, insert it all the way back into the groove and allow the glue to dry for a few minutes before trimming off the excess in the front and back. Repeat this step on the other side of the popper as well.

Here are some photo's of this fly when completed. As you can see, I also sponge painted some white on the bottom of the body to add texture.
I hope you enjoyed this tutorial. I would love to see some of your creations! Feel free to friend me on Facebook and tag me in your Gerbubble Bug photo's so I can check them out. Thanks! - Matt "Z" Zudweg.


Captain Matt "Z" Zudweg guides on Michigan's Muskegon River, specializing in swung fly steelhead and top water bass. Visit his website at www.zflyfishing.com


Tuesday, June 17, 2014

"Zudbubbler" Bass Popper

Inspired by Tom Loving's early 20th century bass popper the "Gerbubble Bug", the Zudbubbler features the unique square head design that makes a hearty pop with very little movement. It's tapered design makes it easier to cast and causes less interference with hook sets, and the many rubber legs make it an irrisistable treat that Large and Smallmouth Bass find too good to pass up. The steps below will guide you through the tying process I use but by all means, get creative! Feel free to email me with your comments or questions at matt@mattzudweg.com


The supplies above are my favorites for tying the Zudbubbler. If you don't have a Zuddy's Leg Puller you can use a bodkin and thread puller... it just takes longer. Green, Chartreuse, Yellow and Black are my favorite ZB body colors, but I have caught numerous bass on every other color offered as well.

Step 1: Using the Leg Puller, poke a hole through the ZB body from back to front keeping it as centered as possible.

Step 2: Slide the ZB body onto the hook and attach your thread (6/0 Uni-thread or similar) just behind the body. This will help you keep track of where the body will be glued later.
(Don't use gel spun thread for this fly as glue will not hold to it as well)

Step 3: Add your favorite color of marabou to the top of the hook, being careful not to advance forward of your starting point yet.

Step 4: Double over a rubber leg and tie it in on the side of the hook. Repeat for the other side as well.

Step 5: Tie in a webby schlappen feather by the tip, color is your choice. I like a color that is contrasting to the popper body and marabou feather.

Step 6: Wind some dubbing onto your thread (Ice Dub is my first choice), and advance forward to where you started your thread.

Step 7: Palmer the schlappen feather through the dubbing and tie off at the point you started your thread earlier in Step 2. Trim the remainder of the schlappen feather and continue winding thread from back to front enough to completely cover the hook... this will give the glue in our next step something to hold to.

Step 8: Run a bead of Zap-A-Gap or equivelant CA glue along the top of the thread base and slide the ZB body onto the hook, twisting around as you go to spread the glue evenly around the thread base. Align the ZB body so it's straight and allow it to dry for a minute.

Step 9: Poke the Zuddy's Leg Puller into the side of the ZB body near the front and poke it through the body diagonally so it comes out near the back. Slide a couple rubber legs in the Leg Puller eye and pull the legs through leaving a little more out the front than the back. Repeat this on the other side as well.

Step 10: Add a small drop of Dave's Flexament or Softex flexible glue to the legs near the front and pull the glue/legs into the body. Repeat on the other side as well.

Using a flexible glue is very important as a CA glue will distort the rubber legs.

At this point your Zudbubbler is very fishy and I normally don't spend any more time on it. If you'd like to however, you can add spots to the body with a sharpie and even eyes to make it even more "Frog-ish". If you are missing fish on the hook set, you can bend the hook a little to increase the gap.


Finished "Zudbubbler"

Captain Matt "Z" Zudweg guides for Feenstra Guide Service and also owns BoneYard Fly Gear.


Friday, February 14, 2014

Z's Copper Rocket

For several years now I've kept this pattern un-named and pretty secretive as I've made slight changes to it. It's accounted for a number of my best fall steelhead days in recent years, although it isn't quite as consistant throughout the entire season as my Wicked Leech pattern. Many clients have tried to name it after it proved a day maker and one name seems to have stuck... the Copper Rocket. As it often happens, a proven trout fly made on a larger scale often makes a great steelhead fly. That is the case with this one as it is largely based off one of my best swung fly Trout patterns (Z's Olive Leech)... I've simply added a little more bulk and some proven colors of Flashabou. This fly is also completely made from synthetic materials.

Step 1: Place a Daiichi 2461 size 2 hook in your vise and wind gel spun 100 D thread to the rear of the hook. Tie in a sparse clump of Copper Ice Dub to the top of the hook, folding the remainder back and advance thread slightly forward.

Step 2: Tie in several more sparse clumps in the same way until you reach the front 1/3rd of the hook.

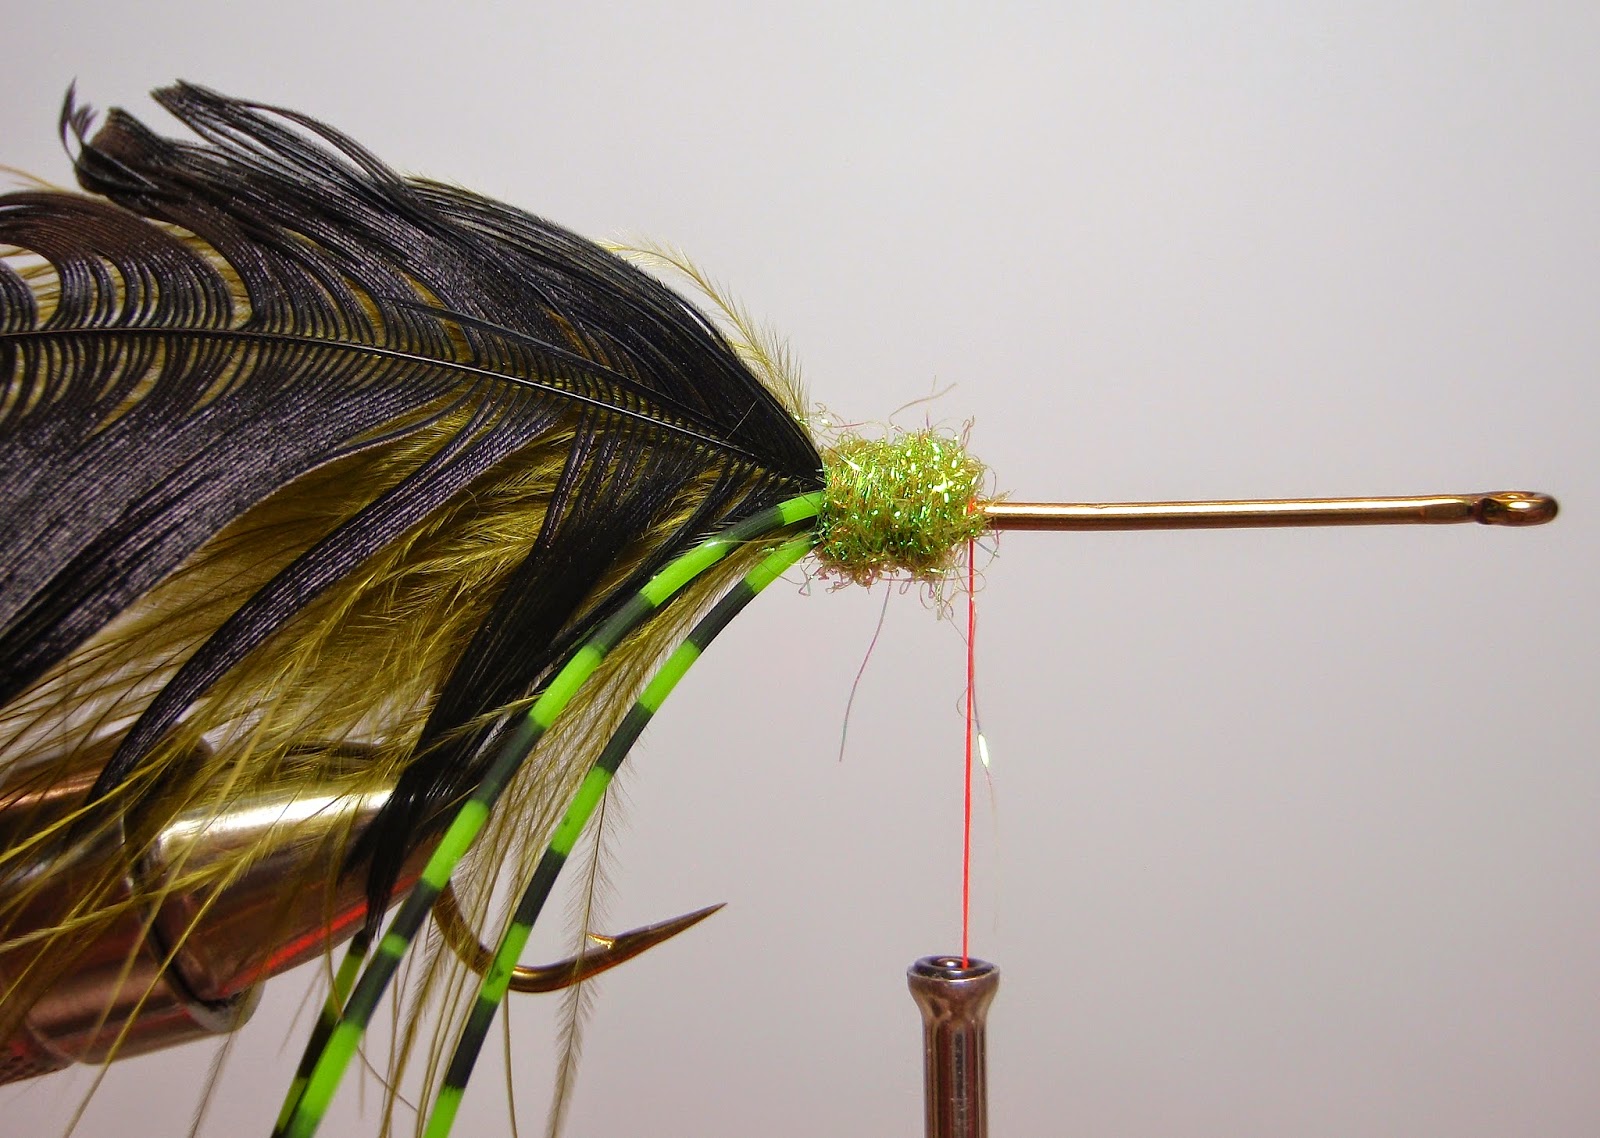
Step 3: Tie in a fairly large clump of UV Dark Olive Ice Dub in the same way, continuing to work towards the front of the hook.

Step 4: Tie in a fairly large clump of Copper Ice Dub. You should now be within an 1/8" of the hook eye, if not you can simply add another clump of Copper.

Step 5: Tie in a couple dozen strands of Senyo's UV Predator Wrap to the top of the hook as shown. I like to spread it around the top and sides evenly before lashing it down tight.

Step 6: Fold back the remainder of the Predator Wrap and tie it down tightly.

Step 7: Now add a few of your favorite Flashbou colors as an overwing. Again, I will spread this around the top and sides evenly before lashing tight. I typically start with Fuschia.

Step 8: For my second overwing, I typically use Copper Flashabou.

Step 9: For my final overwing I use Chartreuse Holographic Flashabou. Other colors I have found work well include Black Rainbow Polar Flash, Bullfrog, Purple and Perch Flashabou.


Tuesday, January 14, 2014

Zuddy's Copper Stone

This is a pattern I've used for many years, during the spring months for steelhead. Based off the classic brassie, it's a pretty simple tie and a very effective pattern. Here are the step by step instructions.

Step 1: Place a Daiichi X510 Size 8 hook in your vice, attach Large Copper Ultra Wire to the top front of the hook using either 6/0 or 3/0 UNI-Thread. Whip finish and cut thread.

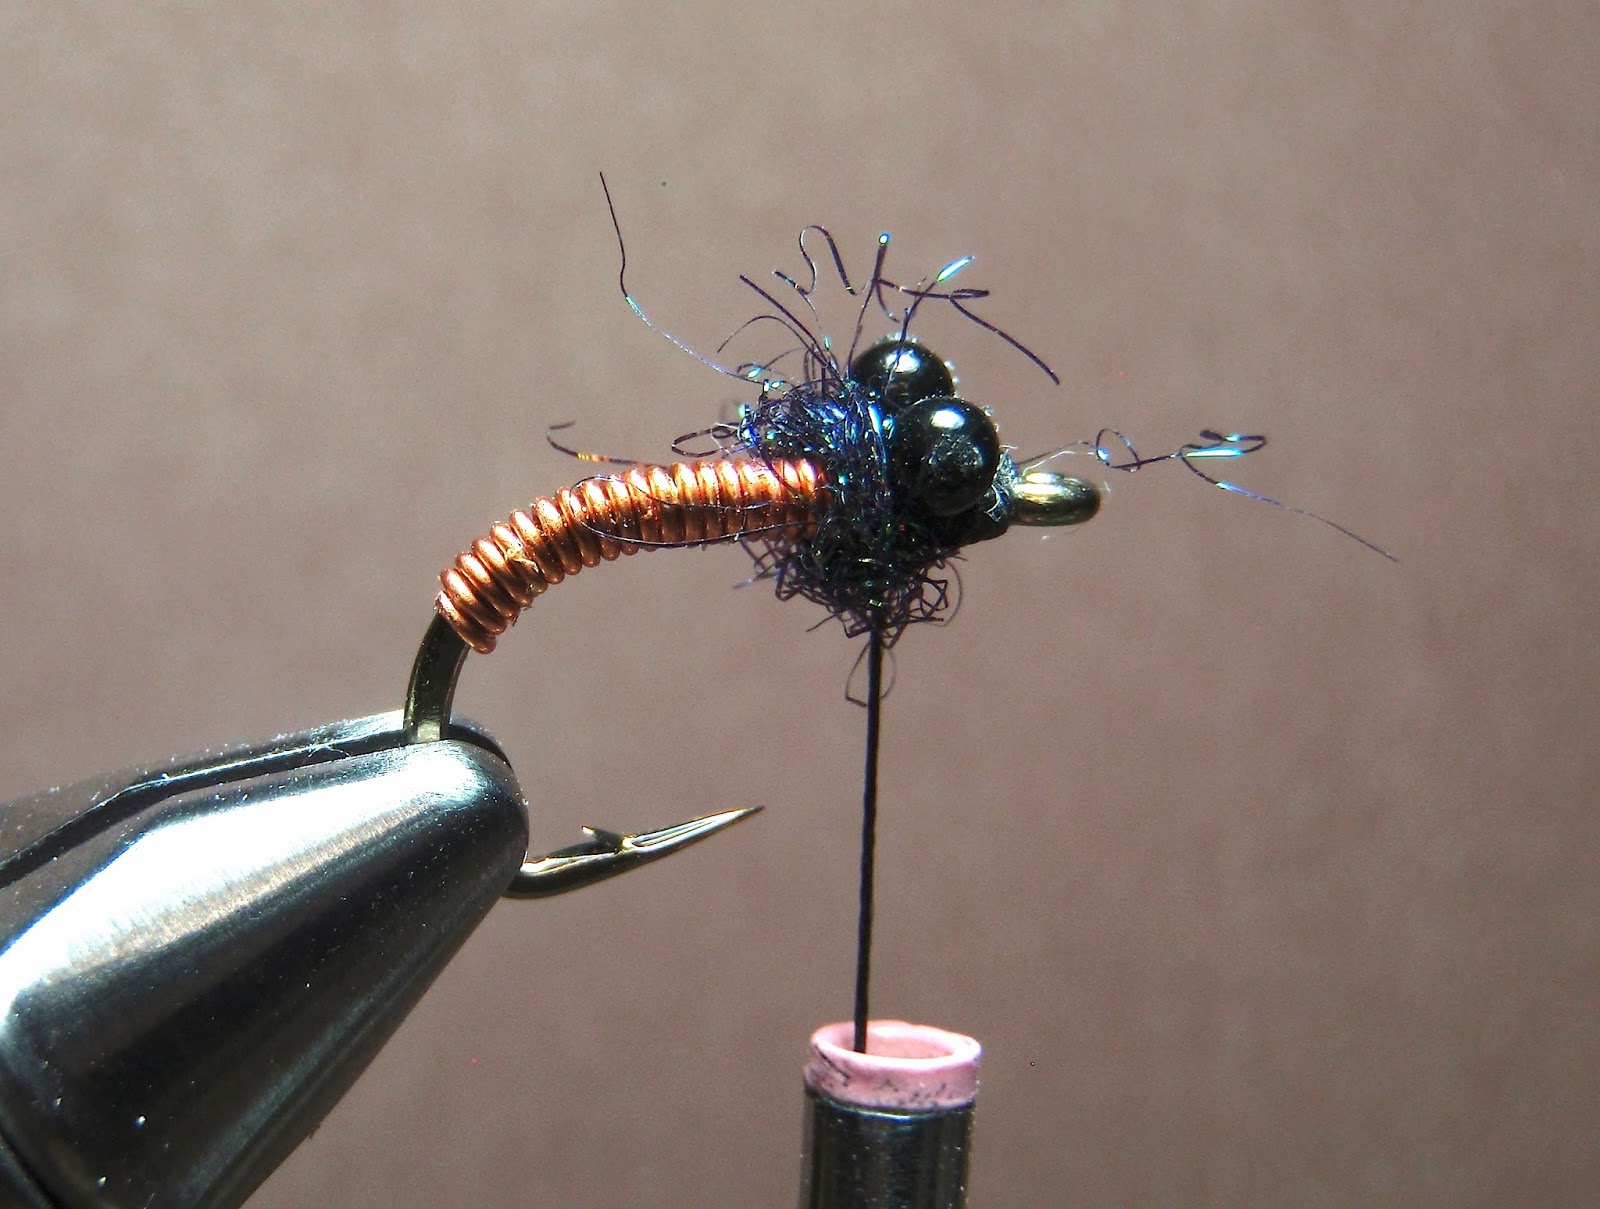
Step 2: Wind the copper wire tightly around the hook to the bend and break off. Re-attach thread just behind the hook eye and attach small bead chain or black mono eyes to the top of the hook.

Step 3: Attach a small amount of Peacock Black Ice Dub to the thread and wrap around just behind the eyes.

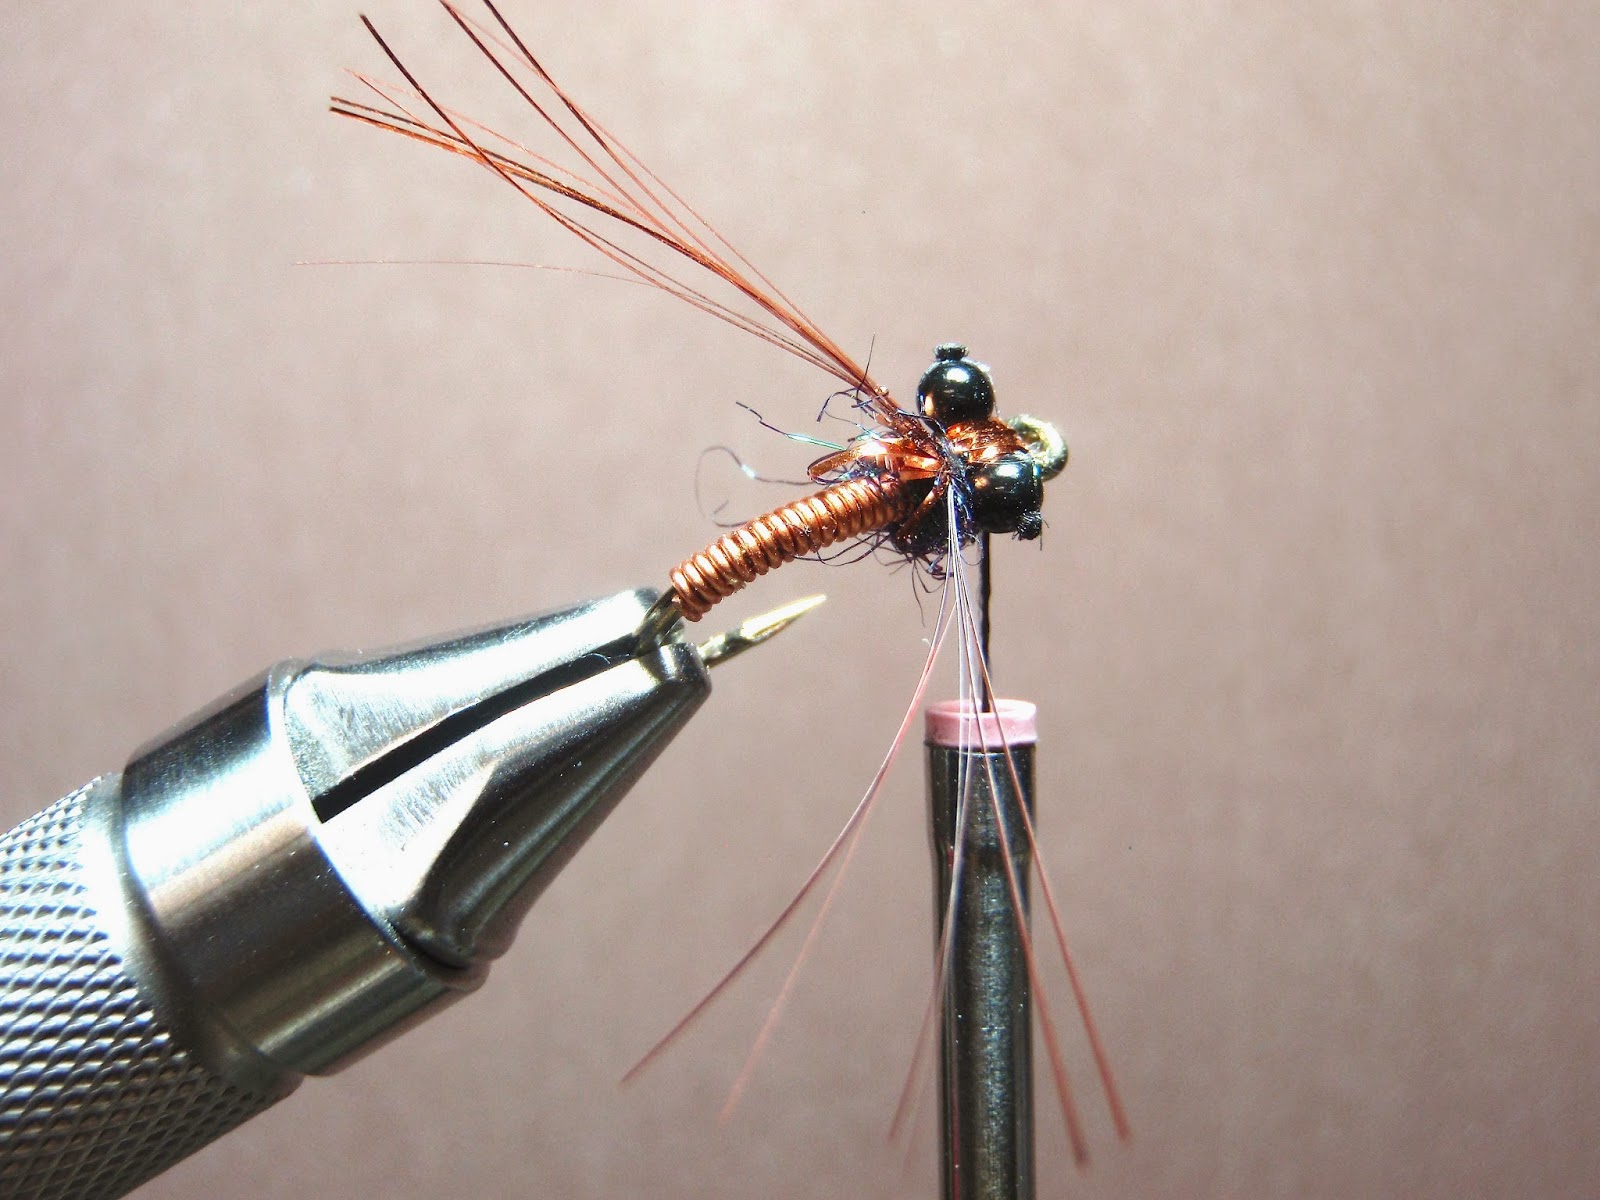
Step 4: Tie in about a dozen strands of Copper Flashabou on top of the hook both behind and in front of the eyes.

Step 5: Tie back half of the Flashabou on the left side and the other half on the right side of the hook as if they were legs.

Step 6: Trim the Flashabou legs and you're ready to fish!